
Contents
![]()
The Widget integration (column / tab or Lightbox mode), takes place in only 3 steps : The minimum HTML page for generating a payment form is as follows: The data-token is the session token for authentication and is obtained in response to the request to initialize a payment (doWebPayment). In order to avoid that a new initialization is performed during each refresh of the page, you must either use a session on your server to store it, or check if the current URL already contains a payment token in a GET parameter named paylinetoken. Here is an example to reuse the token present in the URL: Additional attributes that you can use in the <div> tag allow you to customize the display of the form. For example; if you do not want the payment form to appear automatically when your page is displayed : Function deactivated The parameter allows you to specify a return url for a defined list of partners, for now: AmazonPay When the buyer clicks on the AmazonPay button, he is redirected to the partner to authenticate. Once authenticated, it is redirected to the specified URL. According to the parameters, here are the examples of integration : Payline forces column page display of payment pages when you use tab mode and the size of the device used by the consumer is too small to display properly. This enhancement simplifies your technical integration when you have a "responsive desktop / mobile" store. When a form is requested with several means of payment, some of which are conditioned by the return of a partner API, then: The order in which the payment methods are displayed is carried out with the order specified in the contractList tag of the doWebPayment. In order to interact with the payment form, Payline offers a JavaScript API so that you keep control of the form. Consult the JavaScript API. Customizing the style of the payment form is possible by overriding the stylesheet provided by default by Payline. Consult the CSS customaton. Expense management functions The cost management is present on the payment form and corresponds to the Transaction insert: Administration center: Payment method to configure Administration center: Details of a transaction Payment page The cost management excludes in the following cases:Integration
<html>
 <head>
   <script src="https://homologation-payment.cdn.payline.com/cdn/scripts/widget-min.js"></script>
 </head>
 <body>
 <div id="PaylineWidget"
    data-token="the token obtained in doWebPayment Response"
    data-template="column"
    data-embeddedredirectionallowed="false"
 />
 </body>
</html>
<?php $paylineToken = ( is_empty($_GET['paylinetoken']) ) ? createNewWebPayment() : $_GET['paylinetoken']; ?>
Paramètre Description valeur data-template
The name of the template to use for initializing the form. data-auto-init
Defines whether the form should initialize as soon as the web page has finished loading (auto-init to "true"), or if it must wait for an initialization request (auto-init to "false") data-embeddedredirectionallowed
data-partnerreturnurl
<div id="PaylineWidget"
data-template="shortcut"
data-partnerreturnurl="https://maboutique.com/checkout">Examples of integration of Widget modes
InShop Tab mode InShop Column mode LightBox mode Shortcut mode 


JavaScript API
CSS customization
Lifecycle callback

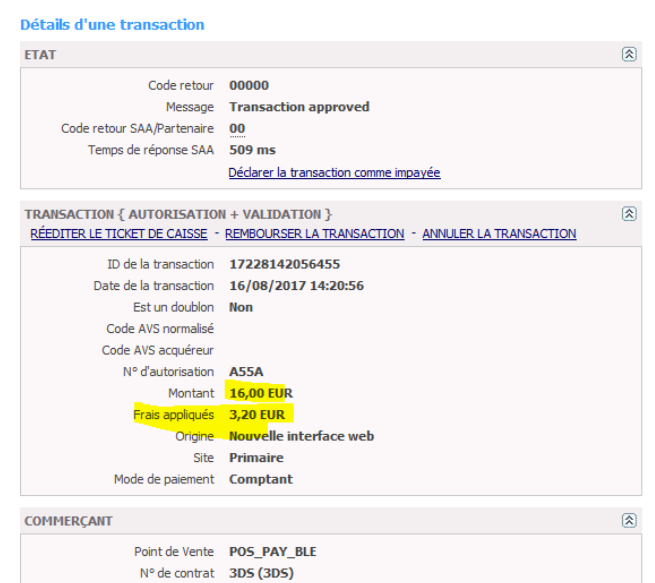

Features Fee Management
The expense management is present on the payment form and corresponds to the Transaction insert:
| Back office : Configure the payment method | Back office : transaction details | Payment page |
|---|---|---|
| |
|
Fee management excludes in the following cases:
- Wallet Payment
- ShortCut Payment
- Payment Rec / NX